Stencil Cards - Donna Lewis
Hello crafty friends. Can I just take a second to say AAAAAAAGHHHH! Ok, that’s better. As you may know, I’ve started studying again, doing my Masters in Translation and Interpreting, and I feel like I’ve been hit by a truck!!! So much to learn!! So little time! So, although I’ve videoed the making of these cards, editing the video will have to wait until mid semester break, as I need to keep swimming if I’m going to keep up with my studies.
Anyway, I’m loving life, even if my editing time has gone right down, so let’s have a look at these cards! Four cards today, as the stencil that I used as my hero product had so many possibilities.
You can see the stencil I used below. I don’t usually put product pictures into my blog, but I think it’s hard to tell what I was working with unless you see it. This is called the floral borders stencil from Paper Rose, and I used the borders individually. Keep reading to see my four ideas.

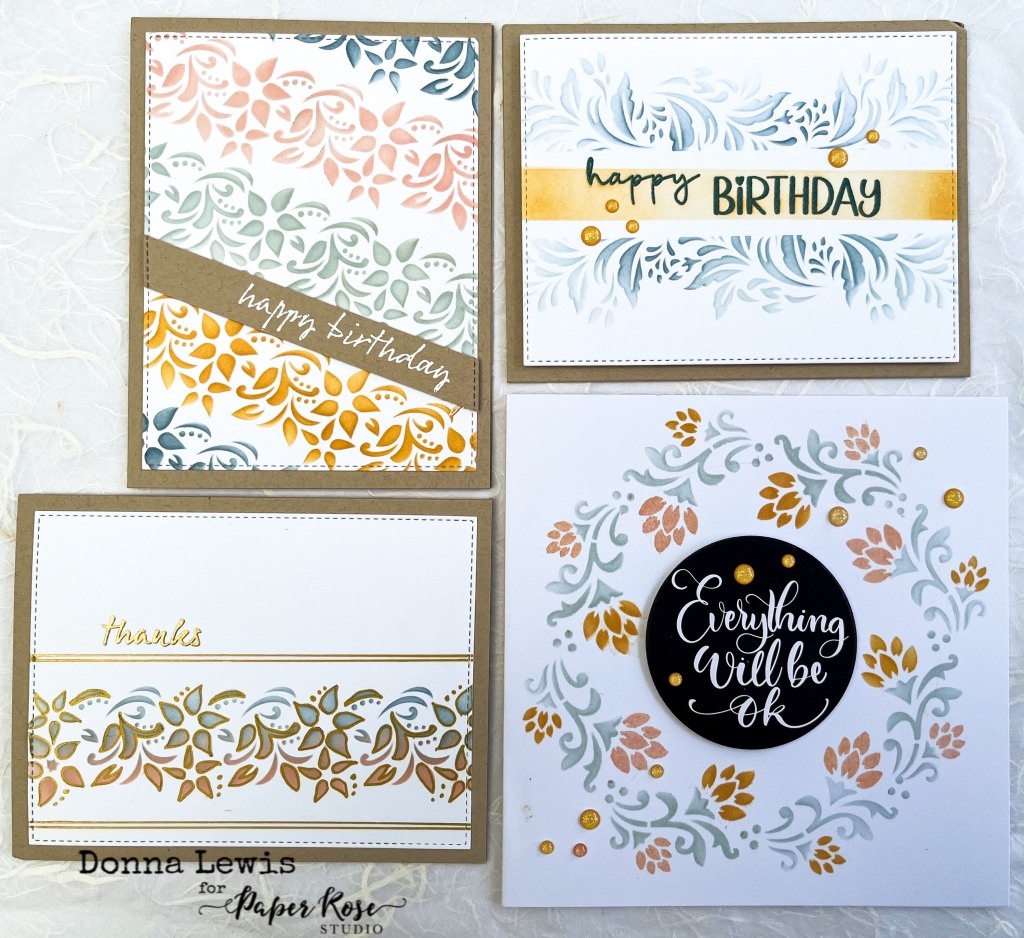
For this first card, I masked off the stencil so that only one line of the borders was exposed, then placed it at an angle on my cardstock. I chose a soft colour palette for these cards, as I’ve been making a bunch of rainbow cards lately and I was ready for something restful. Once I had ink blended over the stencil I moved it up (or down) keeping the same distance between each row, except where the sentiment is – I left a little more space here so that the sentiment wouldn’t cover up too much of the colour. I used Neenah Desert Storm cardstock in 100lb for all of these cards ( except the square one). I haven’t been able to find a similar coloured Kraft cardstock here in Australia – most of them are much more ‘orange’.
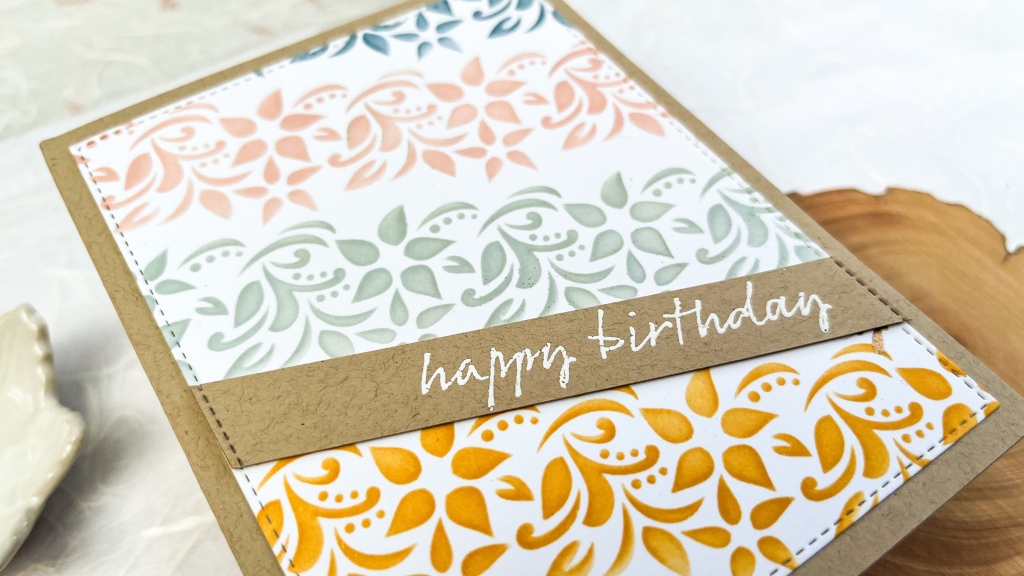
For this next card, as well as masking the stencil, I masked off a centre strip on my card. I then used one of the stencil’s borders and inked above and below this masked off area. Next, I used some orange ink to blending through the middle, with a heavier hand at the sides, and stamped the Happy Birthday in the centre, first in blue ink, then in Versamark clear ink, before heat embossing with some clear embossing powder.
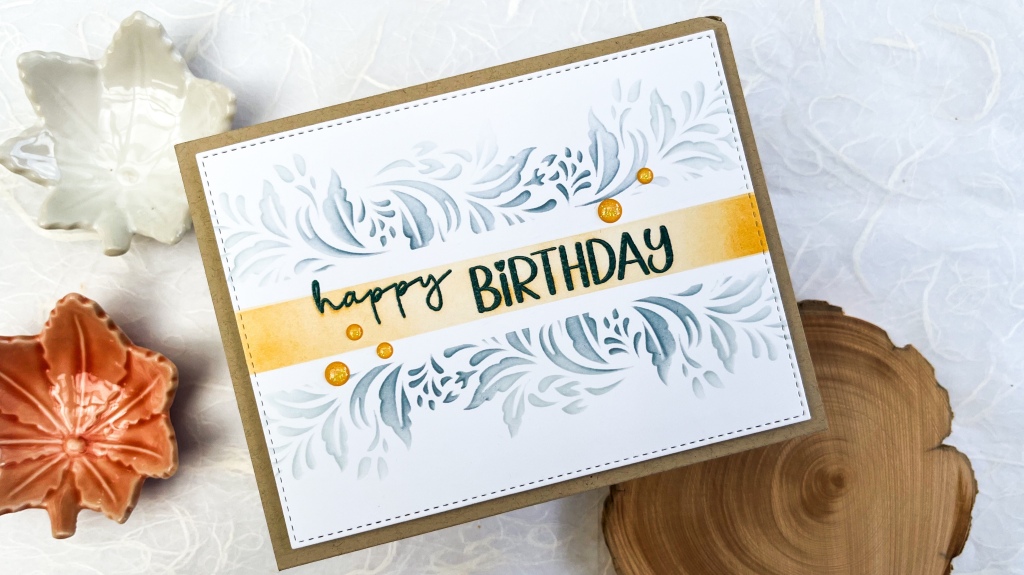
This next card involved a little planning in pencil first. I drew a circle using a die, then marked it off into 8 parts. I have repeated just one of the flowers on stencil (in the second row from the left in the picture above) I ink blended in three steps, using a different colour for the stems and each of the flowers. The central sentiment comes from the Big Black and White Sentiments from Paper Rose.
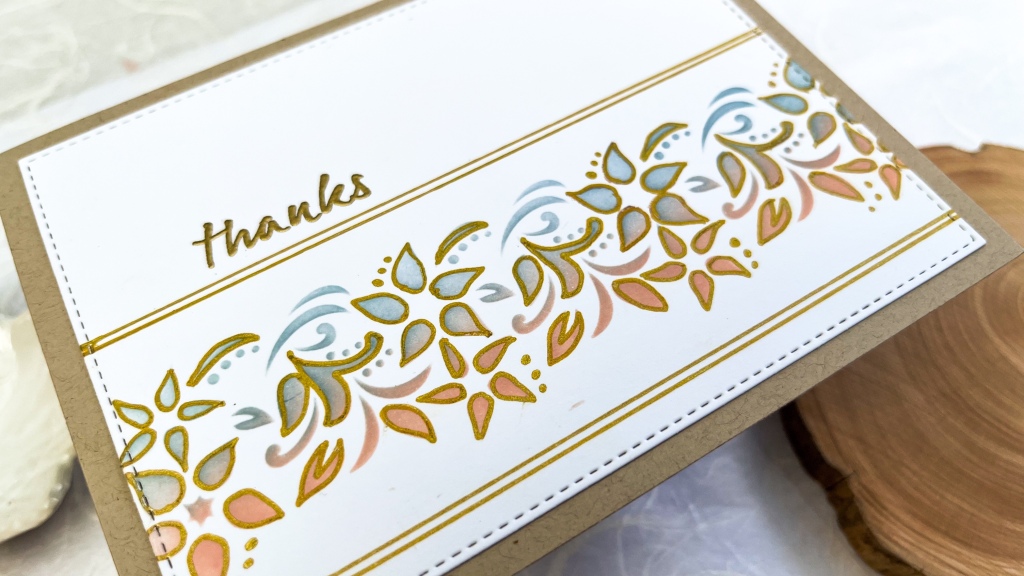
Finally, I blended a gradient for this last card before adding some details with a gold pen. I removed the stencil and just added the outlines freehand, choosing only the bigger sections of the design. I also added two gold lines above and below the stencilled design, and added the word thanks, which I heat embossed in gold. I’ve added links to all the products I used below, so you can see what sentiments etc I used.
I hope that you have enjoyed these cards. I hope to get the video up soon, but I wanted to share with you anyway, even without the video. I hope that you are having a super week.
Until next time, may your days be restful!
Blessings,
Donna
Leave a comment