Scribble Stars - Kelly Bates
Hello friends! Welcome to another post for Paper Rose Studios. Today I’m sharing a simple set of square cards using the Scribble Stars stamp set so let’s get into it.
For today’s cards, you’ll need the following goodies:
Paper Rose Scribble Stars stamp set
Paper Rose Scalloped Square Frames die set
Paper Rose Banners 1 Die Set
4 x 12cm square smooth white cardstock panels
3 x 12.7cm square textured white cardstock panels
8.5cm square piece of foam
Distress Inks in the following colours: Festive Berries, Candied Apple, Mowed Lawn, Pine Needles, Chipped Sapphire and Faded Jeans
Ink Blending tools
DRY Clean cloth or paper towel
Versamark ink, Anti Static powder tool, Clear embossing powder, heat tool
Die cutting machine, liquid glue, foam tape etc.
Embellishments, I’ve used pearls, enamel dots and wooden stars.
Start by taking 3 of your 4 square panels, wipe them with your anti static powder tool and stamp the star images onto each of them in a random pattern. Cover in clear embossing powder and heat set. Set aside to cool.
Take the 4th smooth panel and stamp Merry Christmas once each in Candied Apple and Pine Needles, and the Reach for the stars in Chipped Sapphire. Use the smallest banner die cut out the 2 Merry Christmas sentiments, and then using the partial die cutting technique, cut the Stars sentiment with the third smallest banner.
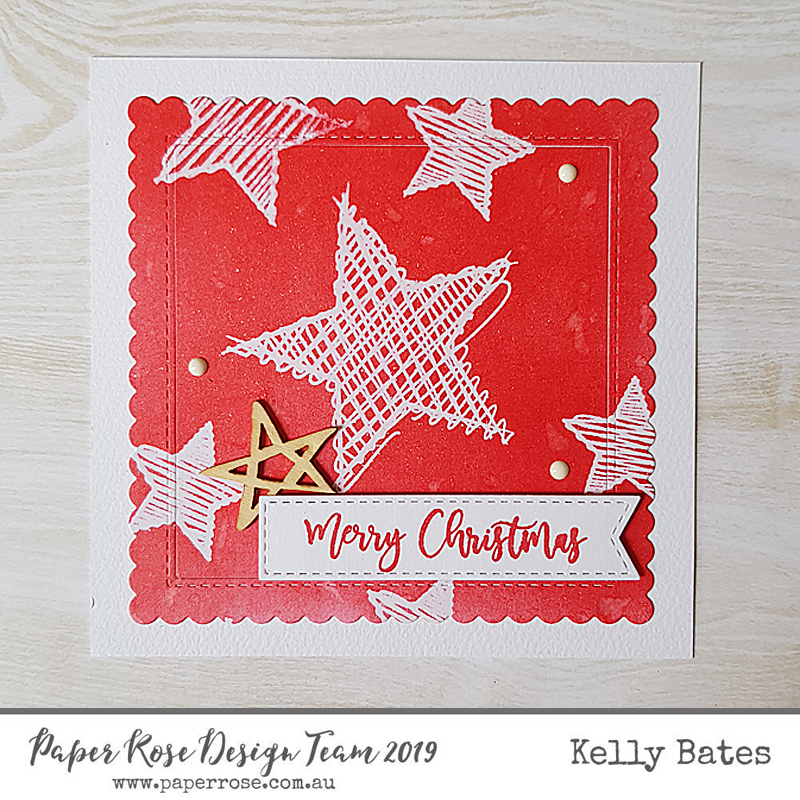
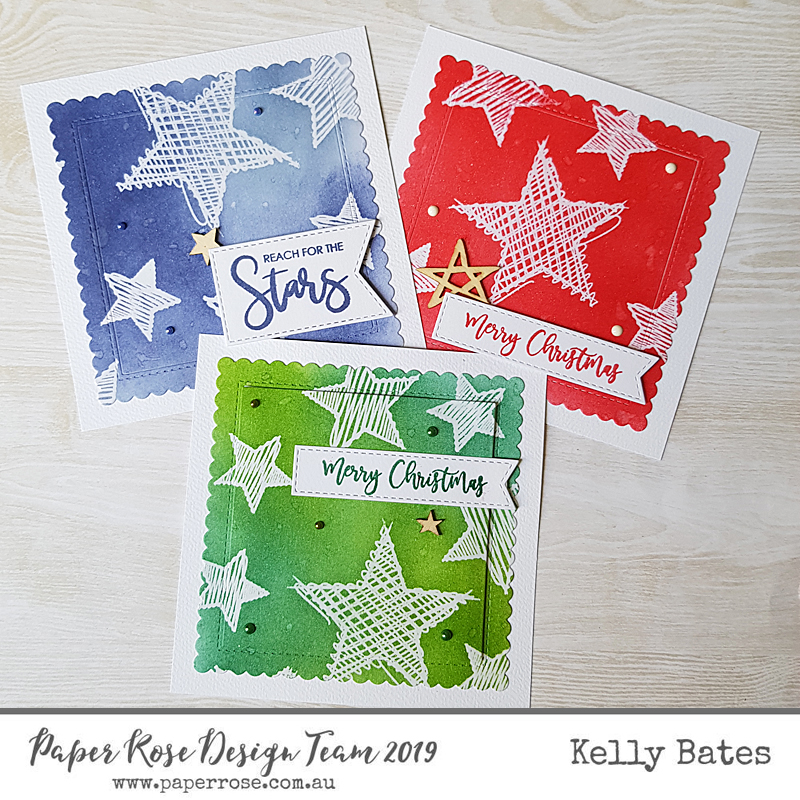
For Card One: I’ve taken the first embossed panel and ink blended a mix of Festive Berries and Candied Apple over top of the whole panel. Using your clean cloth wipe off the ink sitting on top of your clear embossed stars. Splatter a little water on the panel and lift off with paper towel or your cloth. Use the second largest scalloped square and die cut your panels; this will give you two pieces – the border and the insides. Centre the border onto your first textured white panel and glue in place, then glue your square inside the border. Add your red sentiment with foam tape, and finish with enamel dots and wooden star.

For Card Two: The second stars panels has a blend of Faded Jeans and Chipped Sapphire. Use the clean cloth to wipe off the ink sitting on top of the clear embossed stars. Splatter a little water on the panel and lift it off with paper towel or cloth. Use the second largest scalloped square and die cut the panel; this will give you two pieces – the border and the inside. Centre the border onto your next textured white panel and glue in place, and again glue your square inside the border. Attach your blue sentiment with foam tape, add pearls and a wooden star for detail.
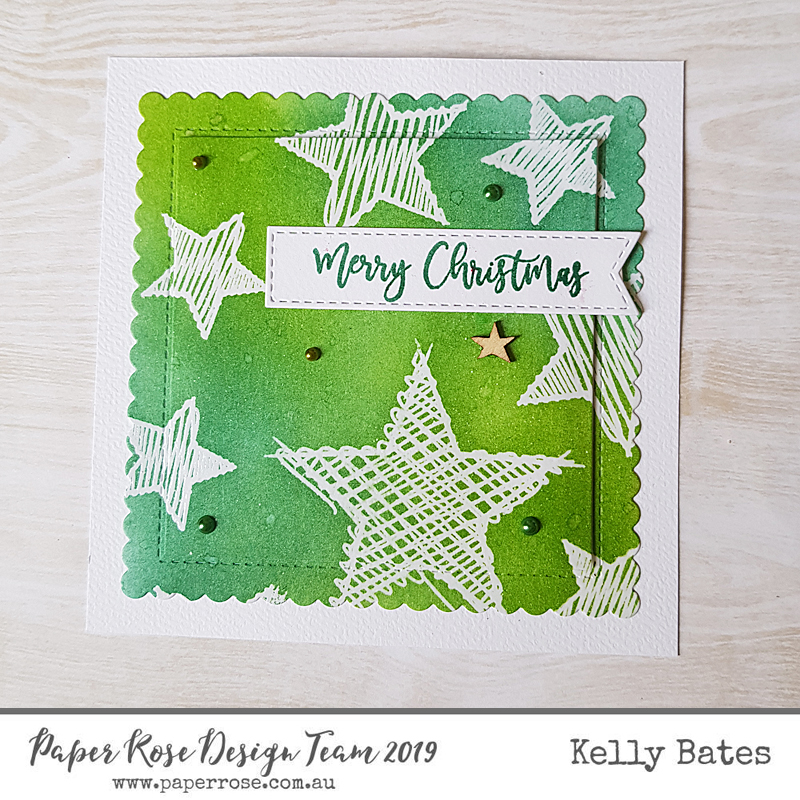
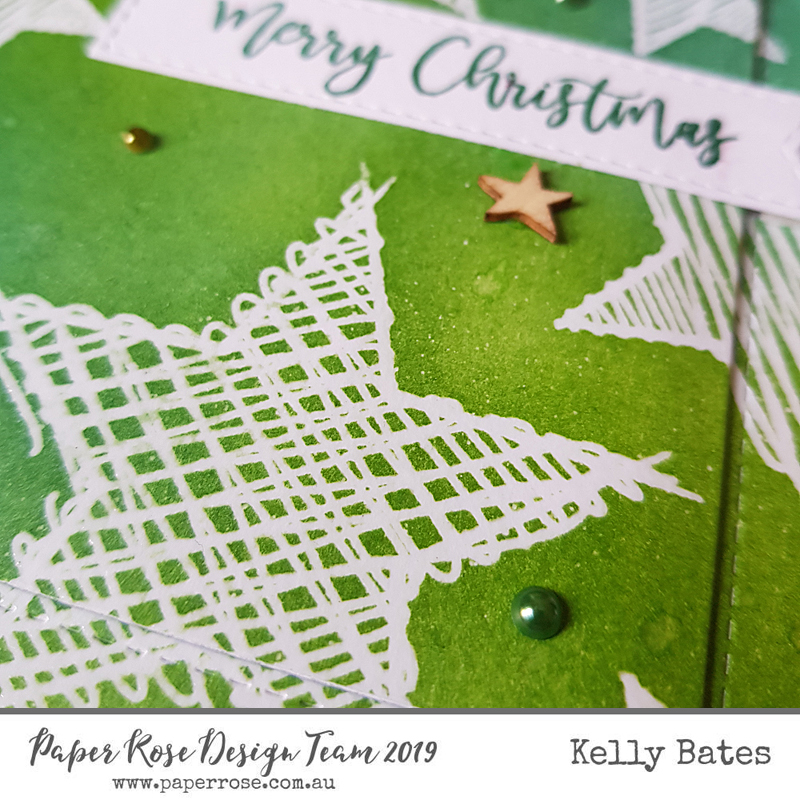
For Card Three: The last stars panels is coloured with a blend of Mowed Lawn and Pine Needles. Again, use the clean cloth to wipe off the ink sitting on top of the clear embossed stars. Splatter a little water on the panel and lift it off with paper towel or cloth. Use the second largest scalloped square and die cut the panel; this will give you two pieces – the border and the inside. Centre the border onto your last textured white panel and glue in place, then take your centre square, attach the square foam piece to the back and glue into place. This will give you a raised centre panel. Attach your green sentiment with glue (and a little piece of foam tape under the piece hanging off the edge), then add pearls and a wooden star for detail.
Leave a comment