Gumnut Baby Bunch - Deborah Adams
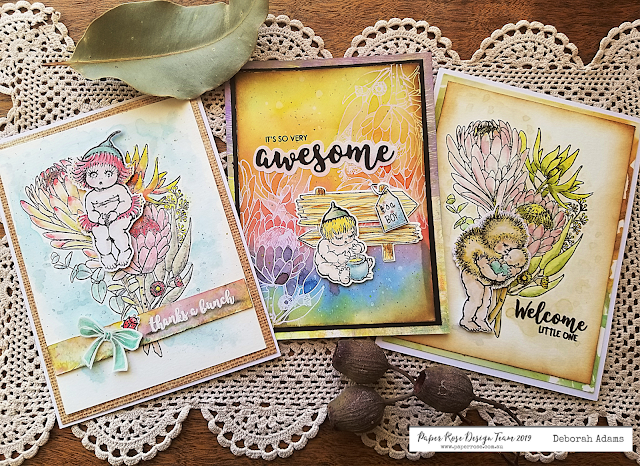
I have made some sweet cards featuring the Gumnut Babies stamps paired with the beautiful new Thanks a Bunch stamp from Paper Rose.
The Thanks a bunch stamp was stamped in Black Archival ink on Watercolour paper & clear heat embossed. The ribbon & sentiment from the same stamp set were also heat embossed but with Versamark ink & WOW white embossing powder.
I had previously stamped, coloured & die cut the gorgeous gumnut baby & ladybug. They came from both the Snugglepot & Cuddlepie Bush Babies stamp & die set & the Bush Babies Accessories stamp & die set.
This inspired the colours used for the flower bunch.
All of the colouring was done with Distress inks & a watercolour brush, with mixing of colours on the palette of the glass media mat.
After white heat embossing the stamp in two opposite corners of this card I wet the paper & floated distress ink colours across the card in a rainbow pattern allowing the colours to blend & pool within the embossed areas.
The Layered Awesome die cut & Awesome Words stamp set were used for the sentiment. Both Snugglepot & Cuddlepie stamp & die sets used again.
Softer tones of Distress Ink were used for this Baby Welcome card. Hard to see in the photos but I floated Biscotti Perfect Pearl spray in the background & Wink of Stella was applied to the babies clothing.
The sentiment is from the Baby Sentiments 1 stamp set. #17907 I framed the edge of the card with Vintage Photo Distress ink & mounted this on an archival reinker background that lifts the browns, greens & yellows of the stamped images.
There have been a few requests for tutorials on colouring techniques by members of the Paper Rose Community Facebook Group. Following is some information on my way of colouring with Distress inks, which is a looser style than the precise colouring using Alcohol markers or Pencils.
My Technique for colouring Gumnut Babies & stamped Florals
Personally I have a wide variety of Distress Ink colours in my stash so they are generally my go to for watercolouring techniques of these stamped images.
But the same techniques could be used with other brands of water colours in palettes, sticks or other water based ink supplies.

I always apply my colours to a palette of some kind so the colours can be blended together or with water before adding to the paper.
There have been a few requests for tutorials on colouring techniques by members of the Paper Rose Community Facebook Group. Following is some information on my way of colouring with Distress inks, which is a looser style than the precise colouring using Alcohol markers or Pencils.
My Technique for colouring Gumnut Babies & stamped Florals
Personally I have a wide variety of Distress Ink colours in my stash so they are generally my go to for watercolouring techniques of these stamped images.
But the same techniques could be used with other brands of water colours in palettes, sticks or other water based ink supplies.

I always apply my colours to a palette of some kind so the colours can be blended together or with water before adding to the paper.
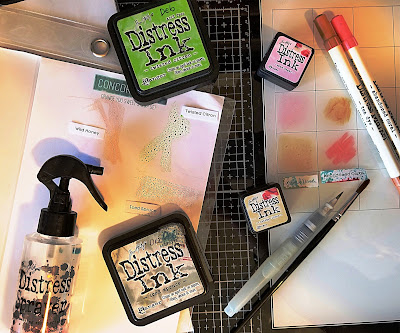
My favourite is just a clear plastic packet from packaging with a piece of white paper inside. This is portable & can be easily wiped clean, of course I also like my Tim Holtz Glass Media mat but this is not essential.
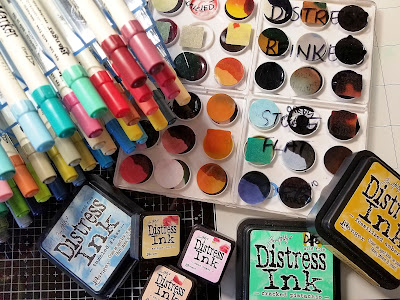
You can apply distress ink colours directly to the palette from your distress markers, mini or regular size distress ink pads or for a more concentrated colour use distress reinkers.
You can apply distress ink colours directly to the palette from your distress markers, mini or regular size distress ink pads or for a more concentrated colour use distress reinkers.
I have my reinkers labelled in a Tim Holtz Palette tray. I have to be careful not to tip this as the ink stays wet. Disadvantage - not portable at all.
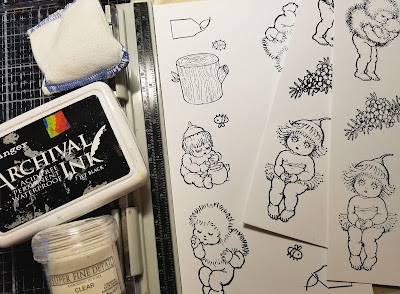
I always use a smooth(ish) watercolour paper (egs. Ranger Distress Watercolor/Canson or Strathmore Cold Press/Mont Marte Premium) I stamp with Black Archival Ink (which remains permanent when dry), sometimes embossing this with Clear embossing powder or with Versamark Ink if I want to white heat emboss the images.
I tend to stamp quite a few images at a time from a stamp set & fill up a whole page of watercolour paper. Doing multiple images especially of the Gumnut babies allows you to try different colour combinations & make all the effort worthwhile. That way you have left overs for future projects.
I generally like to use a fine tip watercolour brush with a fillable water reservoir.
For my backgrounds or larger areas I tend to use a soft larger round brush so I can apply lots of water before floating on the colours. I like to dry between layers with a heat tool, this gives the blotchy watercolour look that I like.
Always finish with some splatters of dilute colours or water only.
Blot off with paper towel while drying again with the heat tool.
Shine can be added with Perfect Pearl, Biscotti or other shimmer spray colours.
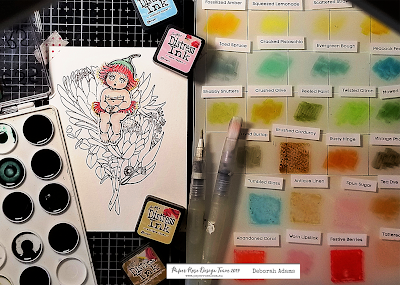
I coloured my images of the Gumnut Babies before diecutting as I find this easier.
I also noted near the images what colours I used for later reference.
This was especially useful for skin colours.
Shine can be added with Perfect Pearl, Biscotti or other shimmer spray colours.
I coloured my images of the Gumnut Babies before diecutting as I find this easier.
I also noted near the images what colours I used for later reference.
This was especially useful for skin colours.
I have staged the colouring to explain the process.
Just remember use a very light application of colour. You can always add more.
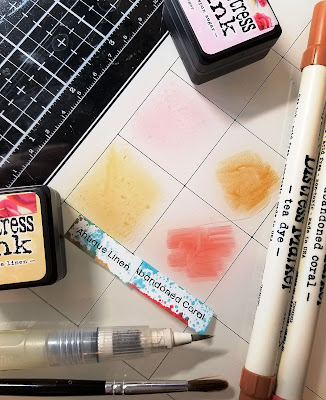
Skin colours used were Antique Linen, Spun Sugar & Tea Dye.
Only small amounts required of each with water for blending.
Make a blend of the 3 colours (Antique linen, Spun sugar & Tea Dye) on your palette with water continuing to go back and forth until you get the depth of colour you like. (photo shows abandoned coral too but it was used for the flower)
Shading in creases, under the hairline & on lower sides of limbs & feet. Imagine the light hitting your image from above. Choose petal & gumnut colours last.
Then you will be confident about larger projects & colouring these to match. My advice for the florals is to apply a light colour to top OR bottom of each petal/stem/leaf then use a deeper or contrasing colour to fill in the rest of each shape with just a random swipe of colour, not intense colouring in.
Use watered down Iced spruce or a neutral colour for shading.
The more colours added the better & more natural the finish.
Hope this has helped those asking for information on colouring.
Cheers for now
Deb Adams








Leave a comment