Butterfly Die 3 Ways - Donna Lewis
Hello crafty friends!
I have a set of three cards today that use the same die set to create very different looks.
The featured die is the Dainty Butterfly Small from Paper Rose Studio. I have created one elegant, one bright, and one delicate card, using this same die for all cards.

This first card uses gold paint for the background. I used a gold paint that I picked up in Japan a few years ago when I had a day off from escorting 23 excited teenagers around the country. I haven’t kept the packaging, but I’m pretty sure it’s a Kuretake paint. It’s a rich, creamy opaque gold. I painted a feature strip through the middle of a watercolour panel, in three layers to get a really rich colour. I then spattered the panel with black paint, this time, definitely Kuretake Gansai Tambi, which is really opaque and doesn’t fade as it dries. I used gold and black paper to cut the layers of both the sentiment and the butterfly. I added these to the card, using foam tape to lift the butterfly off the page.
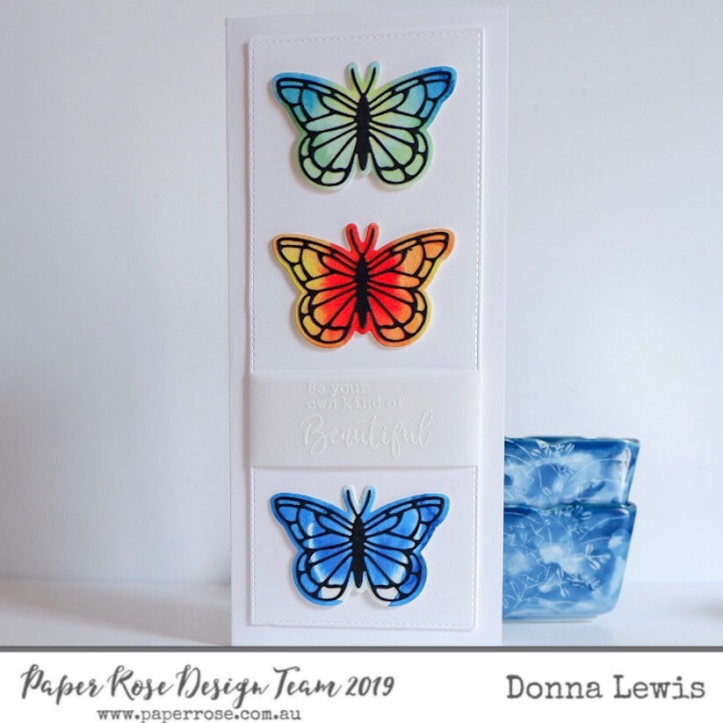
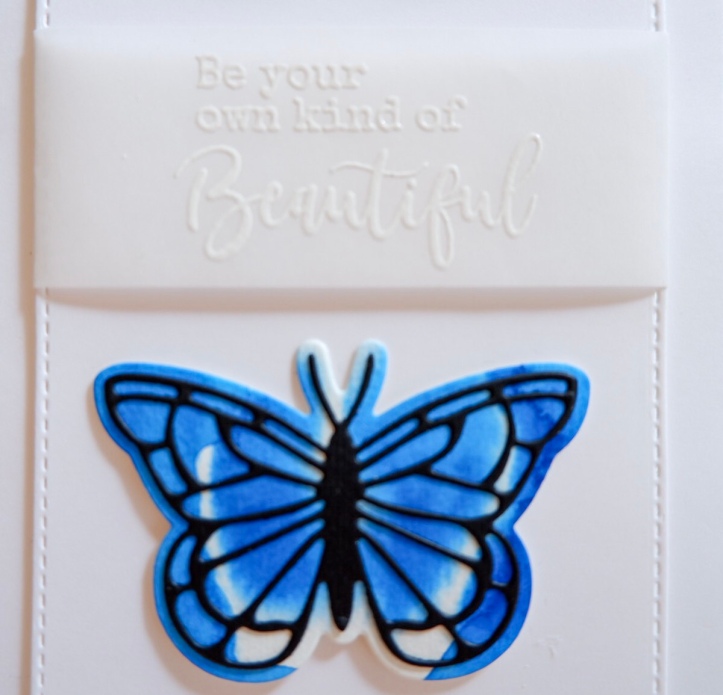
For this next card, I googled images of real butterflies to choose my colours. I taped pieces of watercolour paper to a board, each just big enough for one butterfly. I added paint to each, holding a cutout over the area to check that my paint was (roughly) symmetrical, and that I had covered enough of the paper. In the case of the blue butterfly below, I had to add more paint for the tops of the wings.

Once the paint was completely dry, I carefully peeled back the washi tape, and die cut the butterflies. As an interesting aside, even though washi is Japanese for ‘Japanese paper’, this tape is called ‘masking tape’ in Japanese. It took me a while to figure that out when I was teaching card making here! The sentiment for this card comes from the Beautiful Mandala stamp set, and I heat embossed it onto vellum in white. This card is about 9 1/2 by 21cm in size. The ‘stitched’ panel was cut using the Paper Rose stitched rectangles die. This die is shorter than the card, but by lining up and cutting each end separately, I could make a longer panel, which I popped up with some foam tape.
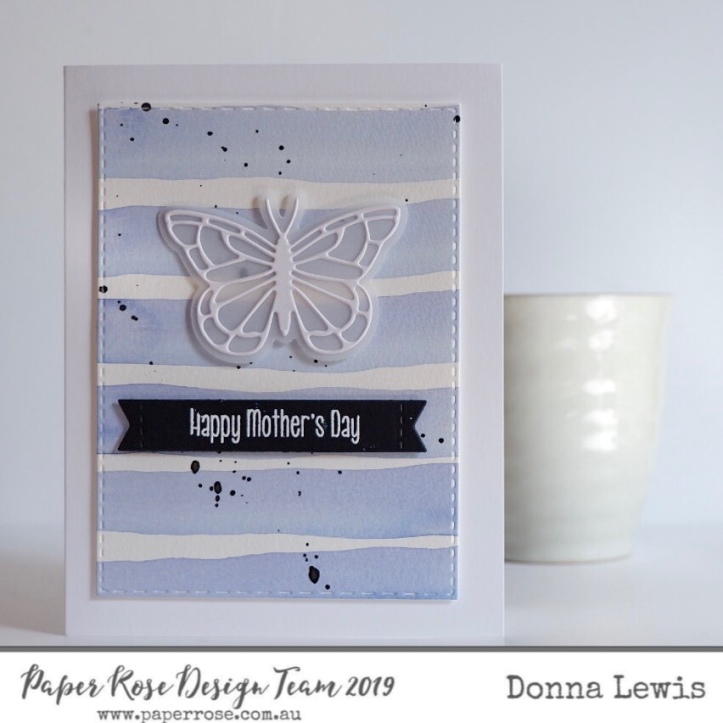
For this final card, I used watercolours to paint a soft striped background, adding splashes of black. I really like a little touch of black on all my pale cards; I think it stops them from looking too washed out or childish. This time, I cut the butterflies from vellum, and the top layer from white card stock.
I used a sentiment out of my stash to complete this Mother’s Day card.

I hope these cards inspire you to play with this gorgeous butterfly die. I’d love to see your creations. If you post on Instagram, please tag me so I can see them. @donnadoll74.
Until next time,
Blessings,
Donna
Leave a comment