Altering Your Stamps - Donna Lewis
Hello Crafty friends. A special welcome to those of you who have recently joined the blog! How are you doing? I’m recovering after a very big day out yesterday. Not having a car here in Tokyo has been really good for my fitness. I met a friend for lunch, and ended up cycling 20km to get there and back! I was glad to be back in the craft room after all that effort! I have a card to share with you today that alters a stamp using various pens, and some no blending copic colouring. Perfect for beginner Copic users!
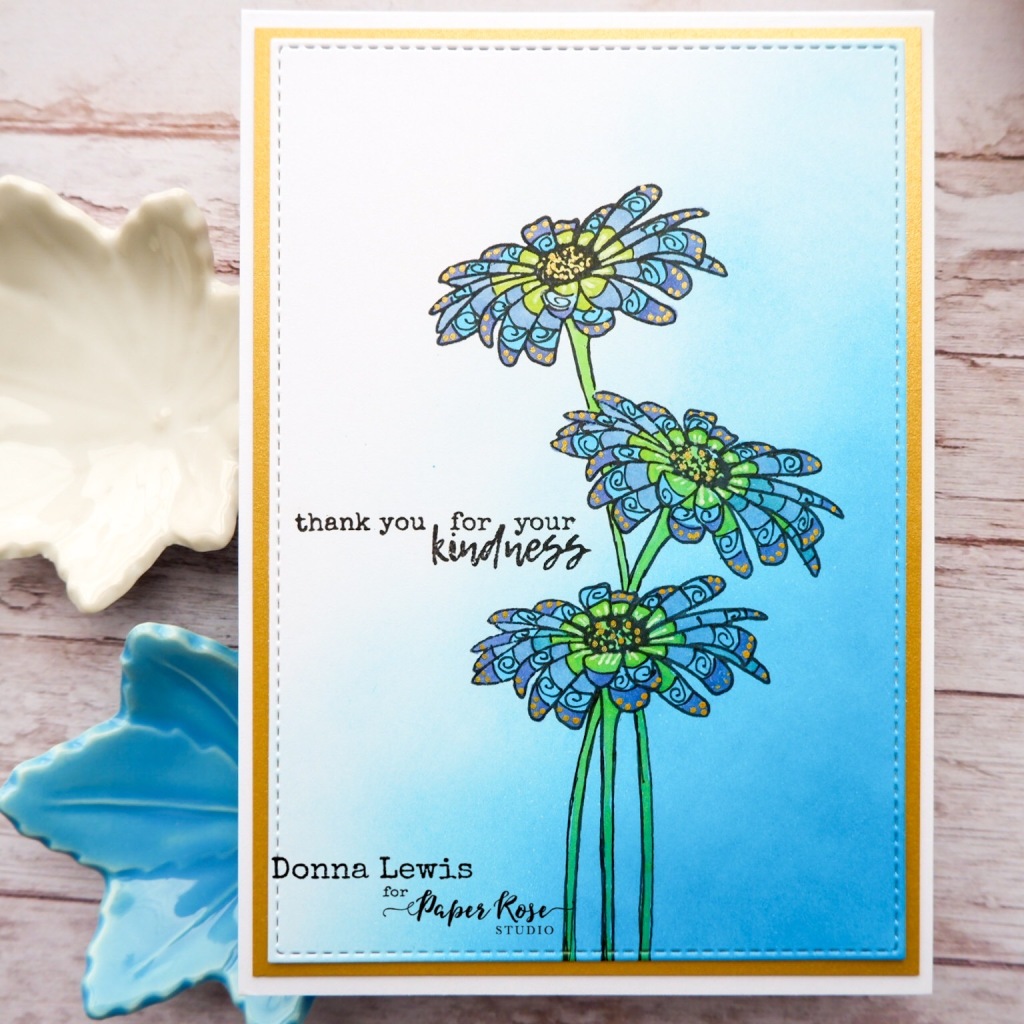
The original stamp is a trio of three daisy flowers called Daisy Days (I’ve only used one of the three stamps for this card), with nice simple lines and no embellishments. You can see another card that I’ve made using this set at the bottom of this post.

To create the background, I ink blended. I used a card front panel from Paper Rose Studio and Island Blue ink from Simon Says Stamp. I blended darkest in the lower right corner and let the ink fade out towards the top of the panel. I then stamped the daisy image three times, and filled in the stems with my pen, before making some extra lines on each petal. I divided each petal into several sections with some curved lines, and added some spirals.

I coloured the petals using Copic colours that ranged from lime green to purple. I chose these colours by moving a few steps left and right around the colour wheel from my background colour. I also added some lines and dots using white and gold gel pens. The sentiment comes from the same Daisy Days stamp set. I cut the panel with the Australian Stitched Rectangles die, and matted it up with some Gold Shimmer Cardstock.
You can see below the daisy detail on another card I made. You can see the full card and directions here.

Until next time, may your days be full of flowers,
Blessings,
Donna
Leave a comment