All A Flutter - Donna Lewis
Hello crafty friends. I usually keep things very light here on this blog, but I’d like to begin today’s blog with a tribute to my nephew Daniel, who was tragically killed in a car accident on January 1st. If you thought I’d been a bit quiet lately, that’s the reason. Cards and crafts, which are such a big part of my days suddenly seem trite compared to the bigger things of life. So, this one’s for you Daniel. May you fly free. Hug your loved ones, my friends.
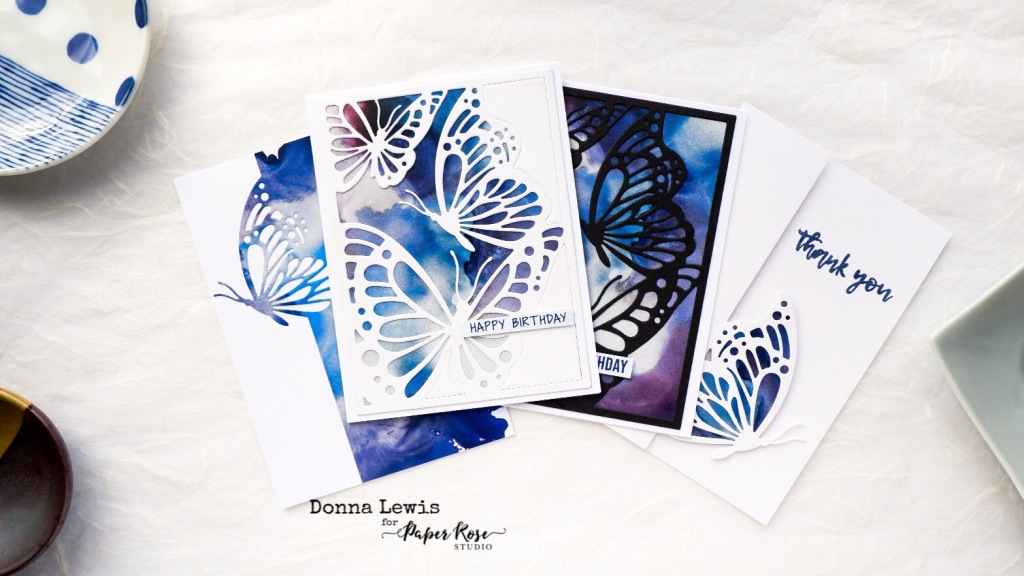
I have a set of butterfly cards for you today. These were actually made and filmed and made in Japan during December, in preparation for our move to Australia which happened on January 3rd. We’re still surrounded by boxes, (as I was then in Japan) and I don’t know where anything is yet, so I’m glad I worked ahead. These cards were made using dies and patterned papers, all from Paper Rose Studio.
You can see the video of the card making below
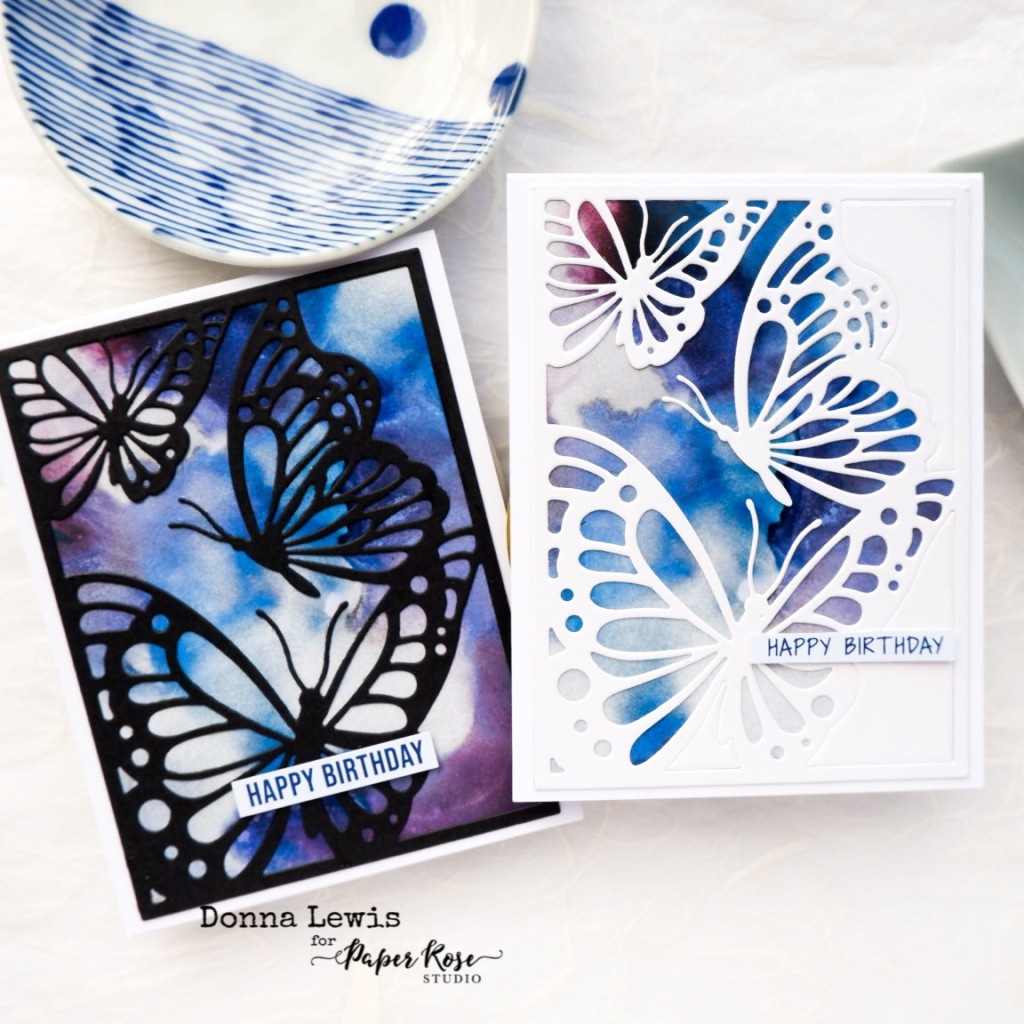
These first two cards are almost identical, except for my choice of black or white paper. The blue inked backgrounds come from a paper set called Inky Antics 1.1, and I used the Butterfly Cover Die to cut the front panel. For the black card, I glued down just the outline, but for the white card, I also stuck down the cut out pieces from the right hand side. The sentiments come from the Rainbow Poppies Sentiment sheets, but since I use them on every second card I make, you may have known that already.
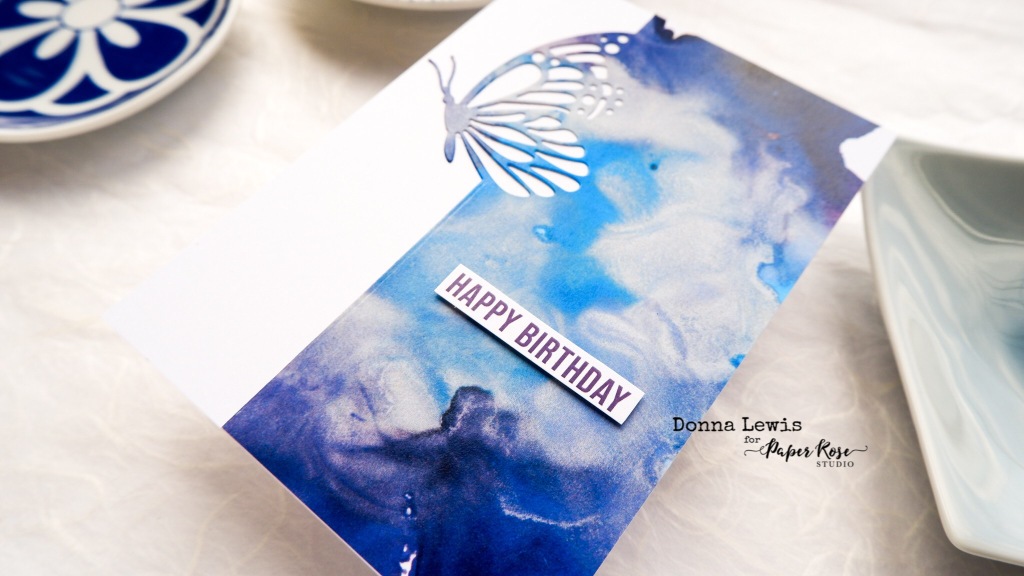
The next cards use a different die, called Butterfly Card Creator, and I’ve used it in two ways. Firstly above, I just cut the die directly onto the patterned paper and glued this onto a card front. Simple and effective.
For the second card below, I have scored some Whisper White Shimmer cardstock in the centre to make a card and then used the die to cut away the right hand side of the card front, as well as create the butterfly. I then cut another butterfly from the same cardstock, fussy cutting the back of the wing with scissors. I sandwiched some patterned paper between the two butterflies to create a partial card front with lots of interest. There’s still lots of room to add my message in the middle. The video is a great place to see how this card is made. It’s the fourth card in the video if you want to jump, but the whole video is under 10 minutes long.
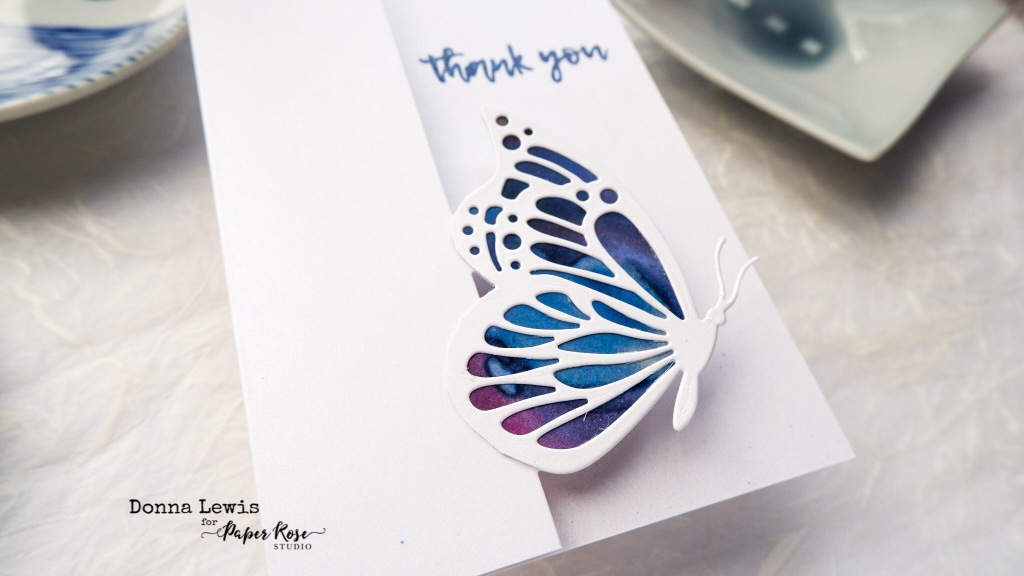
The sentiment on this last card comes from the Daisy Bouquet stamp set, and I stamped in Barbershop blue ink, and heat embossed it in clear embossing powder because the shimmer on the paper would make the ink have difficulty in drying.
I hope that you’ve enjoyed these cards, and that you like butterflies as much as I do.
Until next time, may your days be good ones.
Blessings,
Donna
Leave a comment